
After much arguing and frustration regarding the weeks (did you hear me, WEEKS) of remodeling our kitchen, I decided the true root of the problem was that our basement is chaotic and totally disorganized. Figuring if I could organize the space in about 7 hours, I could alleviate Mr. Buzzkill and I's frustration that comes from losing a tool every ten minutes it seems. So......I decided after surveying the landscape down there in the dark unwaterproofed basement, that we needed to get some tools we commonly use out of corner so we could stop having to climb over the one new and one broken lawn mower and other items to get what we needed. After that, I was planning to totally organize all the tools on the workbench next.
In this segment, hopefully you can benefit from my pain if you don't know how and want to know how to adhere something to morter....say a window box to your brick house. I want to do this eventually, so I'm glad I finally learned how to do so....though I was hot, frustrated, and made 3 trips to our local neighborhood hardware store where a variety of old men viewed me with skepticism each time I walked in asking questions and buying more stuff.
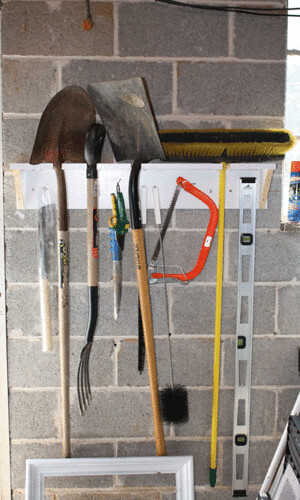
Here is what I accomplished. Next I'll show you how to do it.
I did this wrong sooooo many times, that I have a very hard time remembering exactly how it all went down....so I'll spare you having to read about all of the mistakes, but I'll attempt to point out any pitfalls along the way.
After digging around in some of Mr. BK's containers filled with odds and ends, I found what I thought would work. I compared it to what he'd done in the past and it seemed to match. To match what I will be telling you to do, you need some of these parasleeve things...
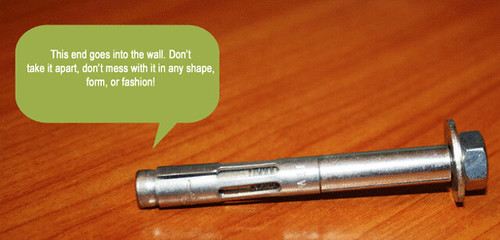
OMG...I just found this link which I so could not find during this project and needed! Agghhh! OK, it cannot be said enough times. Do NOT take apart the parasleeve anchor. Why? Because it expands when you put it in the wall and you can never get it back out! Very impt.
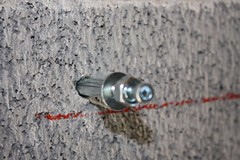
Don't make it look like this... (can you spot the difference here?)

Or you'll end up with this problem....as you can see below I can't take off the nut and washer because the wider end of the anchor is sticking out and not in the wall where it should be.
Also, don't take off the nut and washer like this, or you'll end up having to hold the anchor in place so it won't get lost in wall while you slip the wood over it.
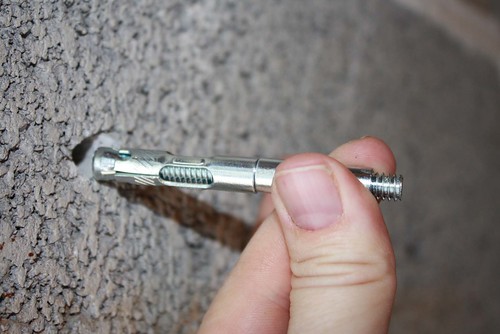
There are so many do nots that I did, I was left sweating and cursing while trying to hold the screw in place with my jewelry pliers and using a diff pair of pliers to turn the nut. Each time I turned it the screw would turn with it and nothing would tighten. This was due to me removing the plain metal part that goes around the anchor. No picture of this mistake.
So, what do you do...
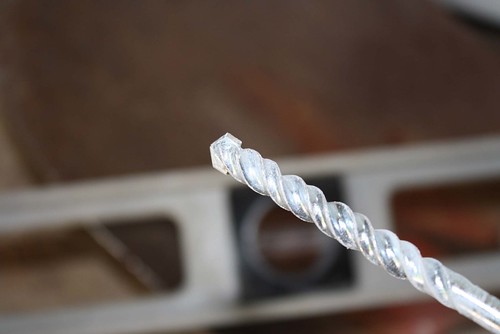
1. Read the instructions to find out what size mortar drilling bit you need and go buy it. In my case, the instructions said to drill a minimum of 1.5 inches into the wall and to use the same size drill bit as the anchor. A bit for drilling morter has wings on the side of it as seen below.
2. Mark your locations for drilling after using a level to ensure they are level.
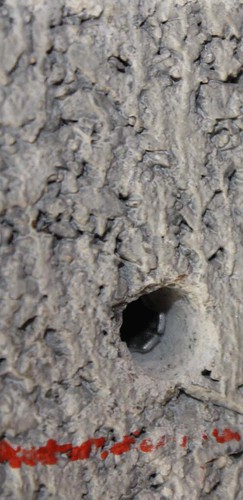
3. Drill a hole. You can mark your drill bit if you need to so you know where to stop. I marked mine with magic marker. Wear some goggles and blow the dust out of the hole with something. I used my breath so that probably will cause me some health issues down the road...I hope not! You will be surprised how easy the drill goes into the morter. I was drilling into what I guess is called a cinderblock. Now in pic below you'll notice I've already made a mistake because if you look closely you can see part of the anchor is in the hole. Unfortunately, I didn't get a pic of just the plain hole. But you get the idea here.
3. Now, drill a hole in the wood you want to adhere to the wall. If you are hanging something I guess you can skip this step. I used the masonry bit to drill the wood and it seemed to work fine.
4. Next, position your anchor in the hole in the wood and then in the hole you just drilled in the morter. Do NOT take it apart!! The end with the washer and nut should be towards you. You are going to need to tighten it later.
5. Take a hammer and bang it in. By the time I got this right, I was too tired to take any pictures. Sad, I know.
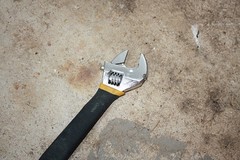
6. Now, tighten that nut up snug against your board. If you can find one of these, you tighten it around the nut. It fits multiple size nuts. I think it's called a crescent wrench. I don't know if it's spelled like the rolls or not. LOL. Please ignore the filfthy state of garage. Dog hair in pic so I'm posting this small in hopes it's less noticeable.
(Off topic....our new fridge makes the most obnoxious noises. It just did. I am told all new ones do this? I hope it's just due to icemaker not being hooked up yet. It could seriously wake up my daughter from her nap!)
7. Give yourself a pat on the back.
(Well cr_p...it did wake her up. I better run!)


No comments:
Post a Comment