
We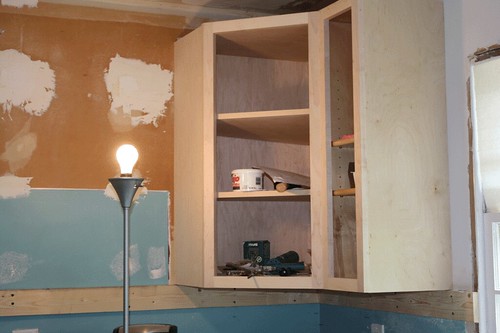 ll, after waiting and waiting and waiting and waiting while Mr. Buzzkill (heretofore I shall be calling him BK bc I'm tired of spelling it out) sanded and sanded and mudded and sanded some more, I could stand it no longer. A couple days after his return to work I did exactly what he said not to do. I asked dude who sold us cabinets if I we should attach all of our wall cabinets together on the floor and raise them up as one, or should we begin with the corner one. He said to begin with the corner one. BK wanted to do the other thing where we hook them all together first. BK had already installed 2x4s along the wall for the back of the wall cabs to rest on. His plan was for me to hold the front while he drilled in screws all along the back of our precious cabs. Well, after R-E-A-D-I-N-G (as you know if you one of my at this time seven visitors) Mr. BK does not believe in reading. Anyhow, after reading about how we should install our Conestoga Wood cabs with beautiful plywood sides and finished maple insides I found out we only needed to screw in the cabs on the top and bottom cleats. These are hidden, unless you were to squat down and really look under the cabinet. I guess some short kids that visit might see them. Oh well. Anyhew, then you are to use a skinny screw and predrill holes to screw the stiles together all along the front. Thank goodness I read this or I'd have screws all along the backs of our cabinets.
ll, after waiting and waiting and waiting and waiting while Mr. Buzzkill (heretofore I shall be calling him BK bc I'm tired of spelling it out) sanded and sanded and mudded and sanded some more, I could stand it no longer. A couple days after his return to work I did exactly what he said not to do. I asked dude who sold us cabinets if I we should attach all of our wall cabinets together on the floor and raise them up as one, or should we begin with the corner one. He said to begin with the corner one. BK wanted to do the other thing where we hook them all together first. BK had already installed 2x4s along the wall for the back of the wall cabs to rest on. His plan was for me to hold the front while he drilled in screws all along the back of our precious cabs. Well, after R-E-A-D-I-N-G (as you know if you one of my at this time seven visitors) Mr. BK does not believe in reading. Anyhow, after reading about how we should install our Conestoga Wood cabs with beautiful plywood sides and finished maple insides I found out we only needed to screw in the cabs on the top and bottom cleats. These are hidden, unless you were to squat down and really look under the cabinet. I guess some short kids that visit might see them. Oh well. Anyhew, then you are to use a skinny screw and predrill holes to screw the stiles together all along the front. Thank goodness I read this or I'd have screws all along the backs of our cabinets. Well, I did it. Whenever I am told I can't do something (which seems like alot lately) I am all the more determined to do it. Case in point, I mowed the entire backyard. Mr. BK actually admitted he was surprised and impressed that day. Then our lawn mower broke a few mows after that and turned into a push mower. I at that time announced I would no longer be mowing. Back to the story....I was supposed to be working and earning money, but instead I used a tall table, some books, bricks, and some flipped over pieces of spare floor with soft foam on the back to balance the one angled corner cabinet that will have glass in the front.
Following the instructions I had gathered from some quick Internet research, I nailed in some long finish nails to ensure I knew where studs were. I do not really trust our studfinder. It has a mind of its own. Then I screwed that sucker in and checked it for level with our 4 foot level. FYI, using anything shorter won't really give you a true reading. I had to convince Mr. BK to buy a 4 foot level. He wasn't going to do it, but I added it to the list of required materials sent from thecabinetjoint.com and made it look like they had put it there. LOL. It worked.
In the image you see my husband added another cabinet to the right side of the angular one. I really should have shot the picture of mine balancing on my tower of books. One reason I went ahead and installed it was because the cab to the left of the corner one has an extra wide stile that needs trimming. I knew we would have to return my brother's table saw soon so I wanted to use it while I could to trim the stile of perfectly straight.


No comments:
Post a Comment